微信小程序之自定義dialog組件
發布時間:2018-05-09 14:47 所屬欄目:小程序開發教程
由于項目開發需求,坑爹的小程序沒有自定義dialog(類似餓了么組件那種)。于是百度了下思路,開發了一個。
參數:
title  標題
cancelText  取消文本 (默認文本為取消)
confirmText  確認文本(默認文本為確定)
animated  是否動畫 (默認為是)
modalSize  模態框大小(默認md)
animationOption  動畫事件(默認300s)
接下來分享下實現步驟吧...主要的概念就是想把自定義的部分通過插槽來接收。
1、創建好components組件且命好名字。 小tips:在微信開發工具內創建方便點它會自動幫你把相關文件配好。
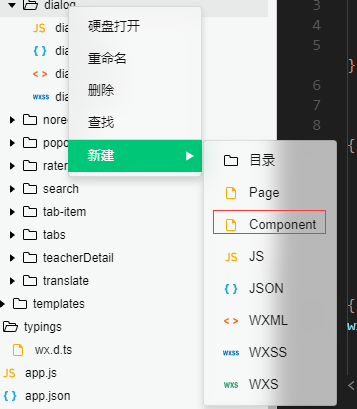
創建組件且命名
2、寫好相關布局及樣式。
dialog.wxss
/** 模態 **/
.modal{
   position: fixed;
   top: 0rpx;
   left: 0rpx;
   right: 0rpx;
   bottom: 0rpx;
   width: 100%;
   height: 100%;
   z-index: 100;
}

.modal-mask{
   position: absolute;
   width: 100%;
   height: 100%;
   z-index: 97;
   background-color: rgba(0,0,0,0.30);
}


.modal-layer-sm{
    width: 60%;
    transform : translate3d(-50%,-50%,0);
    left : 50%;
}

.modal-layer-md{
    width: 80%;
    transform : translate3d(-50%,-50%,0);
    left : 50%;
}

.modal-layer-full{
    width: 100%;
    left: 0;
}


.modal-layer{
   position: absolute;
   background: transparent;
   top: 50%;
   display: flex;
   flex-direction: column;
   z-index: 98;
   box-shadow: 0 4rpx 14rpx rgba(0,0,0,.4);
}

.modal-header{
   background: #fff;
   color: #333;
   padding: 20rpx;
   font-size: 30rpx;
   text-align: center;
   border-top-left-radius: 10rpx;
   border-top-right-radius: 10rpx;
}

.modal-body{
   flex: 1;
   padding: 0 40px 40rpx;
   background: #ffffff;
}


.modal-footer{
   background: #ffffff;
   flex-direction: row;
   display: flex;
   align-items: center;
   width: 100%;
   border-top : 1rpx solid #eee;
   border-bottom-left-radius: 10rpx;
   border-bottom-right-radius: 10rpx;
}

.modal-close{
   color: #fff;
   font-size: 48rpx;
   position: absolute;
   right: 40rpx;
   top: 0;
   z-index: 98;
}


.btn{
 flex: 1;
 text-align: center;
 font-size: 30rpx;
 color:#666;
 padding: 19rpx 5rpx;
}
.btn:first-child{
   border-right: 1px solid #eee;
}
.btn-primary{
 color: #009887;
}
dialog.wxml
<view animation="{{animationData}}" hidden="{{!isShow}}" class='modal'>

<view data-type="mask" catchtap='hideModal' class='modal-mask' ></view>

<view class='modal-layer  modal-layer-radius {{modalSize == "sm" ? " modal-layer-sm" : " modal-layer-md" }} ' >

<!-- 頭部 -->
<view class='modal-header'>
<text>{{title}}</text>
</view>

<!-- 內容區域 -->
<view class='modal-body'>
<slot></slot>
</view>
<view class='modal-footer'>
<text catchtap='_cancelModal' class='btn btn-default'>{{cancelText}}</text>
<text catchtap='_confirmModal' class='btn btn-primary'>{{confirmText}}</text>
</view>
</view>
</view>
dialog.js
// common/component/modal.js
Component({

   /**
    * 組件的屬性列表
    */
   properties: {
     title : {
       type : String,
       value : '這里是默認標題'
     },

     cancelText : {
       type: String,
       value: '取消'
     },

     confirmText : {
       type: String,
       value: '確定'
     },

     backdrop: {
       type: Boolean,
       value: true
     },

     animated : {
       type: Boolean,
       value: true
     },

     //模態框大小(sm md)
     modalSize : {
       type: String,
       value: "md"
     },

     //動畫時間(默認300)
     animationOption : {
       type : Object,
       value  : {
         duration : 300
       }
     },


   },

   /**
    * 組件的初始數據
    */
   data: {
     isShow:false,
     animation : ''
   },


   ready: function () {
      this.animation = wx.createAnimation({
         duration: this.data.animationOption.duration,
         timingFunction: "linear",
         delay: 0
     });
   },

   /**
    * 組件的方法列表
    */
   methods: {
     //modal隱藏
     hideModal : function(e){
       if(e){
         let type = e.currentTarget.dataset.type;
         if (type == 'mask' && !this.data.backdrop) {
           return;
         }
       }
       if (this.data.isShow) this._toggleModal();
     },

     //modal顯示
     showModal: function(){
       if (!this.data.isShow) {
         this._toggleModal();
       }
     },

     //切換modal的顯示還是隱藏
     _toggleModal:function(){
       if(!this.data.animated){
           this.setData({
             isShow: !this.data.isShow
           })
       }
       else{
         let isShow = !this.data.isShow;
         this._executeAnimation(isShow);
       }


     },

     //根據需求執行動畫
     _executeAnimation: function (isShow) {

         let animation = this.animation;
         if (isShow) {

           animation.opacity(0).step();

           this.setData({
             animationData: animation.export(),
             isShow: true
           })

           setTimeout(function () {
             animation.opacity(1).step()
             this.setData({
               animationData: animation.export()
             })
           }.bind(this), 50)
         }
         else {
           animation.opacity(0).step()
           this.setData({
             animationData: animation.export()
           })

           setTimeout(function () {
             this.setData({
               isShow: isShow
             })
           }.bind(this), this.data.animationOption.duration)

         }


       },
       //取消事件 向外部page 發送事件通知
       _cancelModal : function(){
         this.hideModal();
         this.triggerEvent("cancelEvent");
       },

       //確認事件
       _confirmModal : function(){
         this.triggerEvent("confirmEvent");
       }

   }
 })
核心都在這叻~注釋都有哦。
分析下怎么做到自定義彈層吧。
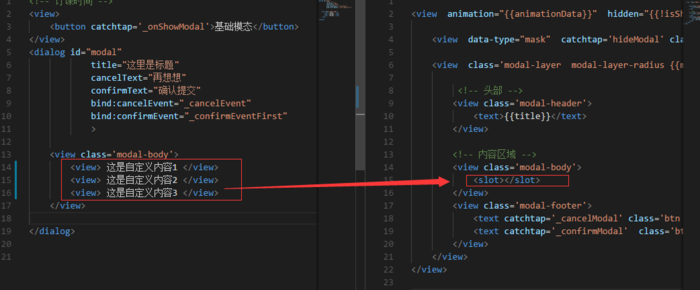
slot圖
通過slot圖所示,從圖中可以知道通過slot插槽來接受modal-body里頭自定義的代碼。因為這里只需要一個插槽,所以插槽的名字可以省略,會自動配上。如果是需要多個slot的話,記得為插槽加上name="xxx"屬性命名哦,對應的視圖塊通過 slot="xxx"接受對應的插槽數據。
引用組件須知
js部分
需用在頁面渲染的時候獲取組件
 onReady: function () {
this.Modal = this.selectComponent("#modal");
},
取消按鈕以及確定按鈕的回調事件
_cancelEvent : function(){
   console.log("點擊取消!");
}

_confirmEventFirst : function(){
   console.log("點擊確定了!");
this.Modal.hideModal();
}
控制modal顯示和隱藏
this.Modal.showModal();//顯示
this.Modal.hideModal(); //隱藏
好了展示下效果唄~
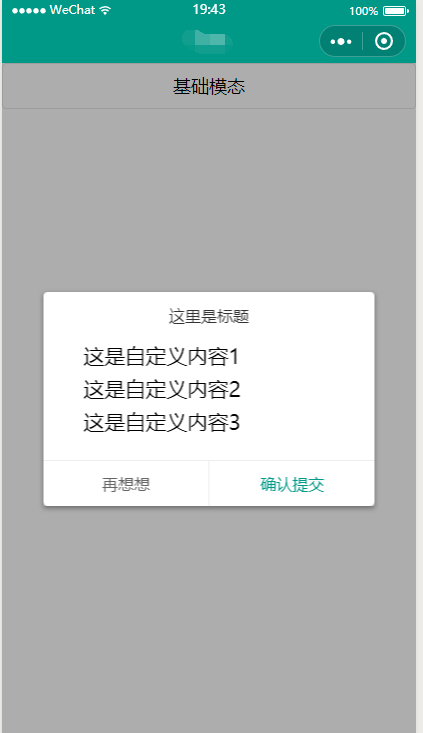
效果圖.png
對了。標題這塊以及按鈕塊都可以根據自己的需求再做調整哦。
樣式也可以調整。
路過的小伙伴給下star哦~